Key Takeaways
- The 180-Degree Rule: Achieving cinematic motion blur requires manual shutter speeds (usually 1/60 or 1/120), necessitating ND filters in bright daylight.
- Stitching Complications: Adding glass over 360 lenses changes the optical focal point, often requiring manual stitch calibration in post-production.
- Glass Quality Matters: Cheap filters introduce color casts and flaring that are notoriously difficult to grade out of 360 footage.
- Vibration Management: Heavier filters can introduce micro-vibrations to FPV quads; weight balance is critical for smooth flight characteristics.
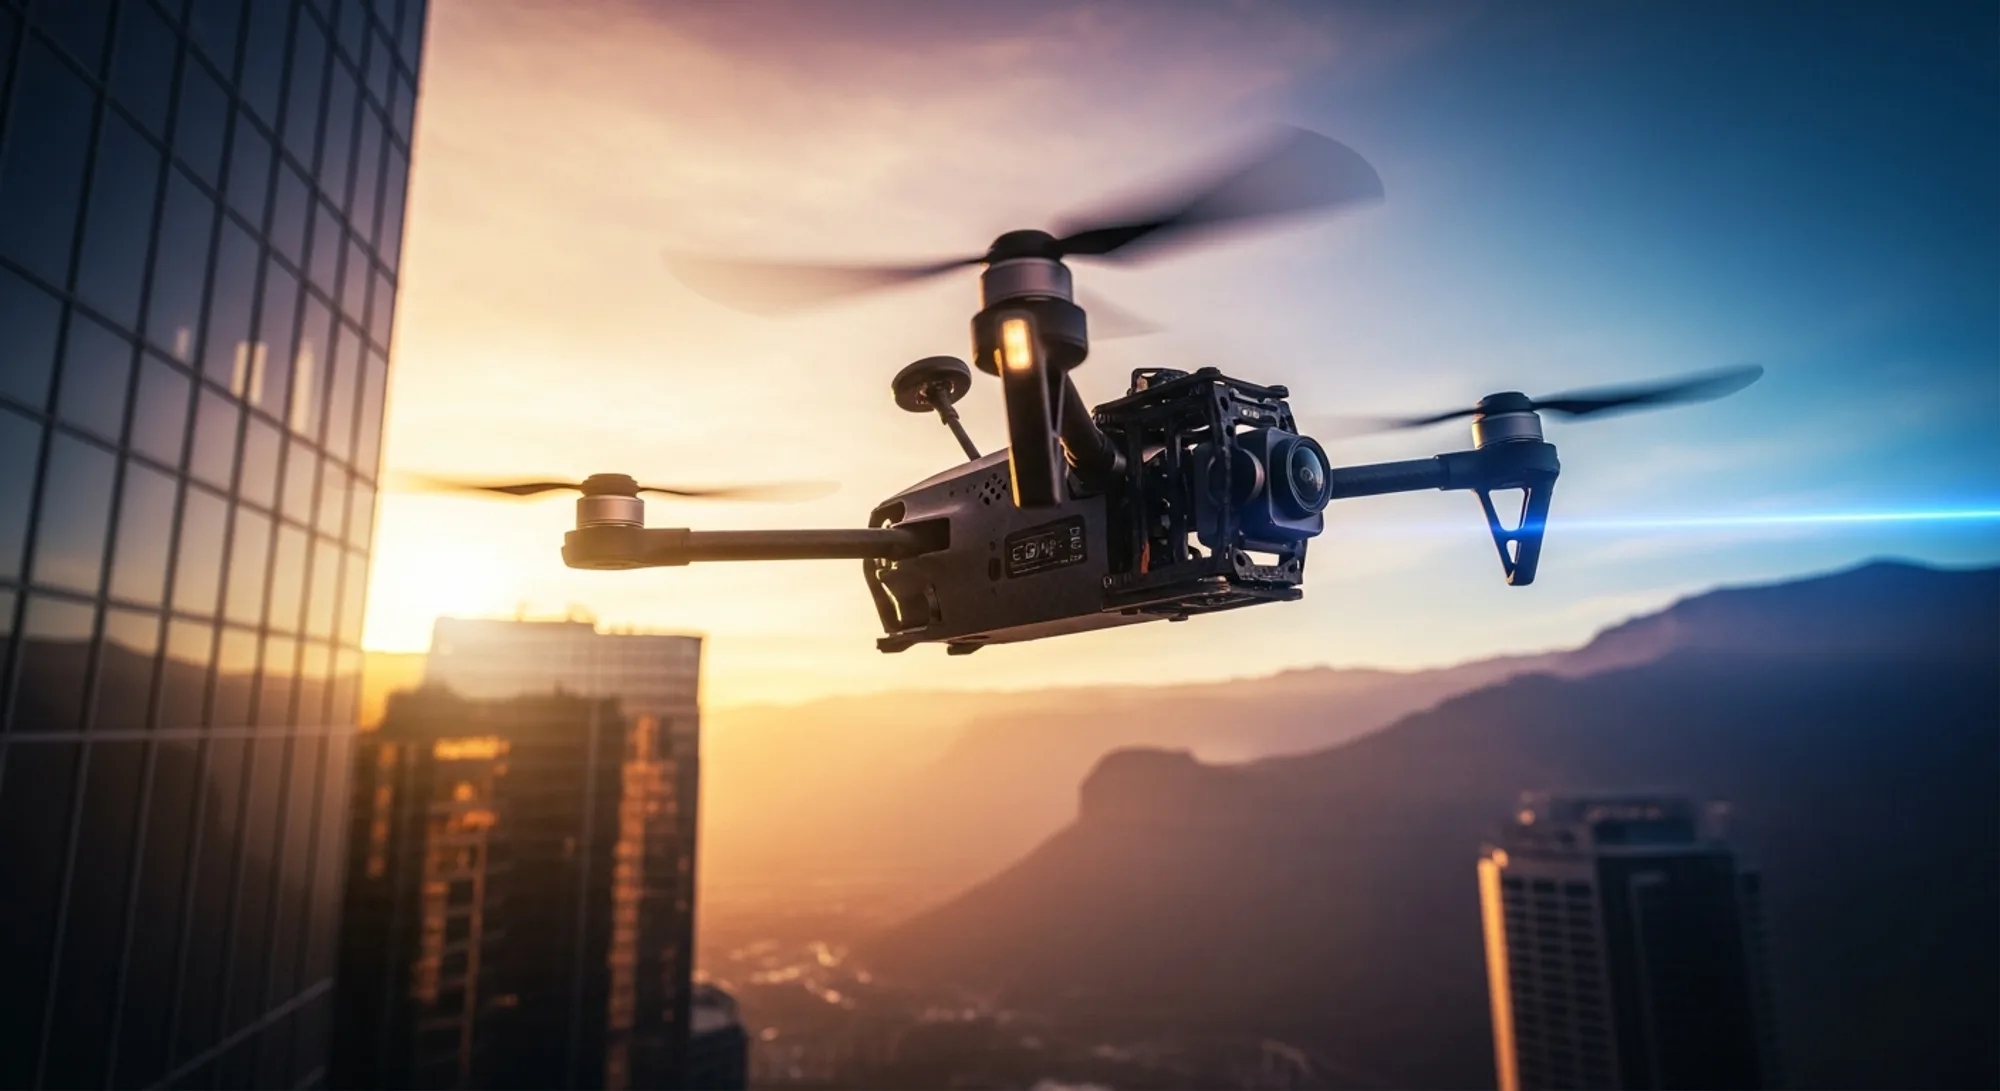
If you have ever watched your raw 360 FPV footage after a high-speed dive and wondered why the ground looks like a strobe-lit disco floor rather than a smooth blur of speed, you have encountered the high-shutter-speed problem. As Billy Stevenson, I have spent the better part of the last decade strapping cameras to racing drones, and the transition to 360-degree capture has revolutionized how we frame action sports. However, it has also introduced a unique set of optical challenges.
In 2026, the hardware has peaked with devices like the Insta360 X4 and the latest iterations from competitors, but the physics of light remain unchanged. To get that buttery FPV cinematic motion blur, you need to cut the light hitting the sensor. This brings us to the often-overlooked but essential world of 360 camera ND filters.
In this guide, I am conducting a shootout between the top filter options available this year and, more importantly, teaching you the dark art of stitching footage that has been optically altered by extra glass.
Why ND Filters are Non-Negotiable for FPV
Before we dive into the glass, we need to understand the "why." Action cameras and 360 cams default to "Auto" exposure. In bright sunlight—where most FPV freestyle takes place—the camera compensates for the intense light by cranking the shutter speed up to 1/2000th or 1/4000th of a second. While this exposes the image correctly, it freezes every single frame with razor-sharp precision.
When you play that back at 30 or 60 frames per second, the lack of blur between frames creates a jittery, robotic look. This is the enemy of cinematic flow.
To follow the 180-degree shutter rule (a standard in cinema), your shutter speed should be double your frame rate. If you shoot at 60fps, you want a shutter of 1/120. In daylight, this results in a completely blown-out, white image unless you put "sunglasses" on your lens. Those sunglasses are Neutral Density (ND) filters.
For a deeper dive into how shutter angles affect perception in digital imaging, Wired has excellent resources on the evolution of digital cinematography sensors.
The 2026 ND Filter Shootout
For this review, I tested three distinct tiers of action camera accessories specifically designed for the Insta360 X4 and generic 360 setups mounted on 5-inch freestyle quads. The goal? To find the balance between optical clarity, durability, and stitch compatibility.
1. The Premium Contender: Freewell Magnetic Series
Freewell has long been the gold standard for drone optics. Their 2026 magnetic lineup for 360 cameras is impressive. The glass is treated with hydrophobic and scratch-resistant coatings, which is vital when you are ripping through bando dust or chasing drift cars.
- Pros: Zero color cast. The magnetic swap system allows you to change from ND8 to ND32 in seconds without unscrewing the lens guard.
- Cons: They are slightly thicker than standard screw-ons, which makes the drone video stitching process trickier (more on that later).
- Verdict: The best choice for professional work where image fidelity is paramount.
2. The OEM Standard: Insta360 Official ND Set
You generally cannot go wrong with the manufacturer's own gear. The official Insta360 X4 filters are designed to match the curvature of the lens elements perfectly.
- Pros: Best stitching performance out of the box. The software algorithms recognize these filters and adjust automatically.
- Cons: The screw-on mechanism is tedious in the field, and the glass feels slightly more brittle than the Freewell units.
- Verdict: The safest bet for pilots who don't want to spend hours in post-production fixing stitch lines.
3. The Budget Option: Generic/Telesin Filters
Available on most marketplaces, these are often half the price of the premium versions. But do they hold up?
- Pros: Cheap. If you crash and smash one, you won't cry.
- Cons: Significant color shifting. In my tests, the ND16 introduced a heavy magenta cast that made FPV color grading a nightmare. They also tend to flare badly when facing directly into the sun.
- Verdict: Good for practice, but not for client delivery.
If you are looking for a smaller rig for tight spaces where these filters might be too bulky, check out my review on FPV 360 Cinematography: Insta360 GO 3 Review (2026) to see if a smaller form factor suits your flight style better.
The Stitching Nightmare: Physics vs. Software
This is the section that separates the hobbyists from the pros. When you place a piece of glass over a 180-degree fisheye lens, you are effectively increasing the distance between the optical center of the lens and the subject. You are also introducing refraction.
In a 360 camera, the software stitches the front and rear images together based on a precise, pre-calculated distance. ND filters disrupt this calculation. The result? A thick, visible "seam" where the images meet. In FPV, this usually manifests as a warped drone frame or a disjointed horizon line.
Pro Tip: Never rely on automatic stitching when using third-party ND filters. The algorithm assumes a naked lens or a standard lens guard, not a thick piece of darkened glass.
Step-by-Step Stitching Fix
Here is my workflow for fixing filter-induced stitch errors using Insta360 Studio (or similar software like Mistika VR):
- Import Raw Files: Always shoot in the highest resolution LOG format available.
- Enable "Lens Guard" Mode: Even if you aren't using the official guards, toggling this option tells the software to account for extra refraction. This often gets you 90% of the way there.
- Manual Stitch Calibration: In the stitching tab, look for "Stitch Optimization" or "Custom Stitch." You will see sliders for X, Y, and Z axis offset.
- The "Safe Zone" Technique: Rotate your 360 video until the stitch line is visible against a straight edge (like a building or the horizon). Adjust the sliders until the line becomes continuous.
- Dynamic Stitching: If your software supports it, enable "Dynamic Stitching" or "Optical Flow." This analyzes the movement of pixels to hide the seam, which is crucial for high-speed FPV cinematic motion blur.
For those flying invisible drone setups, the stitching tolerances are even tighter. I discussed the complexities of hiding the drone frame in my analysis of the Insta360 Sphere Review (2026): Best Invisible Drone Rig?, which is highly relevant if you are struggling to make your quadcopter disappear.
FPV Color Grading with ND Filters
Once you have solved the motion blur and the stitching, you have to deal with color. As mentioned in the ND filter review 2026 section above, adding glass sits between your sensor and the world. High-density filters (ND16, ND32) often block infrared light unevenly, leading to color pollution.
Correcting the "ND Cast"
When grading 360 footage, you must apply corrections globally before reframing. If you reframe first and then grade, you might miss inconsistencies at the edges.
1. White Balance First: Do not trust Auto WB with an ND filter. If you didn't set a manual Kelvin value in-camera (usually 5500K for daylight), use a color picker on a neutral grey or white surface in your footage to normalize the temperature.
2. Tint Correction: If you used budget filters, you will likely see a green or magenta tint. Use the Tint slider to offset this before touching saturation.
3. Contrast Recovery: ND filters can sometimes reduce micro-contrast, making the image look flat. A slight S-curve in your luma channel helps bring back the "pop" without crushing the shadows.
For the latest updates on sensor color science and how manufacturers are combating IR pollution, PetaPixel offers consistent coverage on camera tech advancements.
Installation & Safety for FPV Pilots
Mounting filters on a cinema rig is one thing; mounting them on a drone that pulls 5G turns is another. A loose filter is not just a lost accessory; it is a projectile that can strike your props.
Vibration Dampening: ND filters add weight to the camera head. On a long lever arm (like a carbon fiber mount on a 5-inch quad), this extra mass can introduce low-frequency resonance (jello) that no amount of stabilization can fix. Ensure your 360 camera mount is printed from TPU (Thermoplastic Polyurethane) with at least 95A hardness to support the extra weight without wobbling.
The "Tape Hack": Even with magnetic or screw-on filters, I always add a tiny strip of electrical tape or a dab of hot glue to the edge of the filter frame and the camera body. It’s ugly, but it prevents the filter from vibrating loose during high-RPM motor output.
If you are looking to upgrade your gimbal-stabilized drones rather than your FPV rig, check out our Best Drone Gimbal Cameras (2026): US Pilot Buying Guide to see how integrated ND systems compare to these add-ons.
Conclusion: Are They Worth the Hassle?
Is the struggle with stitching, color grading, and mounting worth it? Absolutely. The difference between a shutter-dragged, motion-blurred FPV shot and a stuttering, high-shutter video is the difference between a video that feels like flying and a video that feels like a video game.
For 2026, my recommendation is to invest in the Freewell Magnetic Series if you are comfortable with advanced stitching workflows, or stick to the Insta360 Official filters if you want a plug-and-play experience. Avoid the budget bins; in 360 cinematography, bad glass ruins the immersion instantly.
Fly safe, check your stitch lines, and keep that shutter speed locked.
